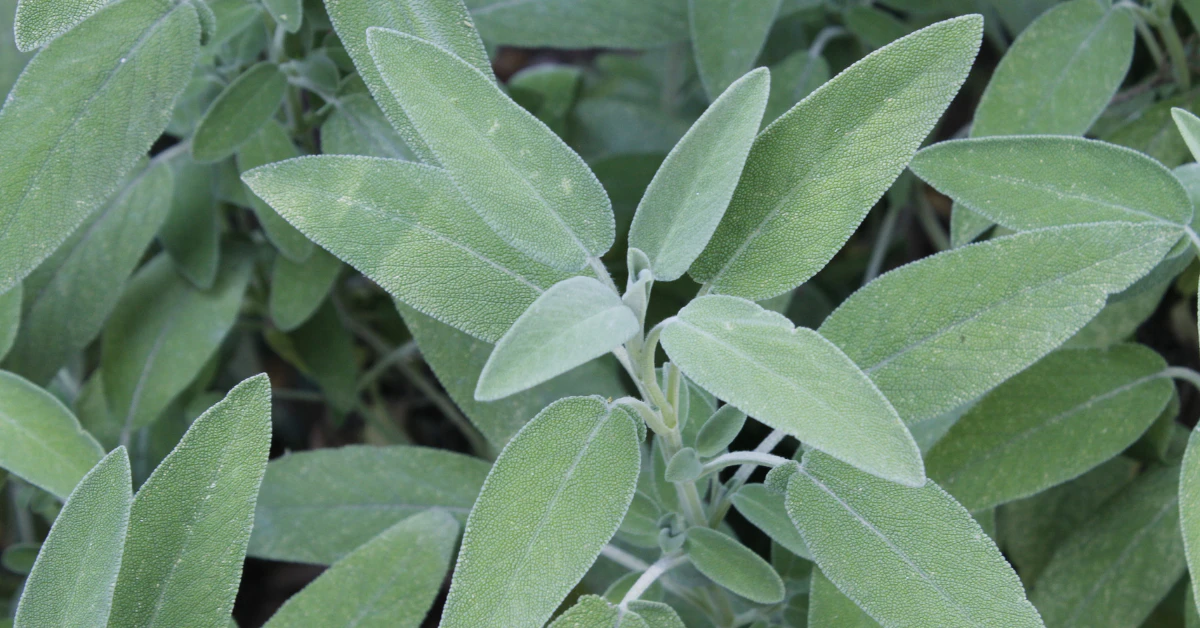
Harvest sage in the morning, once the dew has dried. Pick leaves before the plant flowers for the best flavor. Use clean, sharp scissors or pruners, and cut just above a leaf node, the spot where two leaves meet the stem. Never take more than a third of the plant at once.
Cutting into a plant you have cared for can feel scary. What if you cut too much? What if it never grows back?
Take a breath. Sage is a tough, forgiving herb, and once you know a few simple rules, you really cannot go too far wrong.
This guide walks you through it all. You will learn how to snip leaves for dinner, dry a big batch for winter, save seeds, and even cut stems for smudging. By the end, you will feel confident every time you reach for your shears.
When to Harvest Sage: Timing by Growing Zone and Plant Age
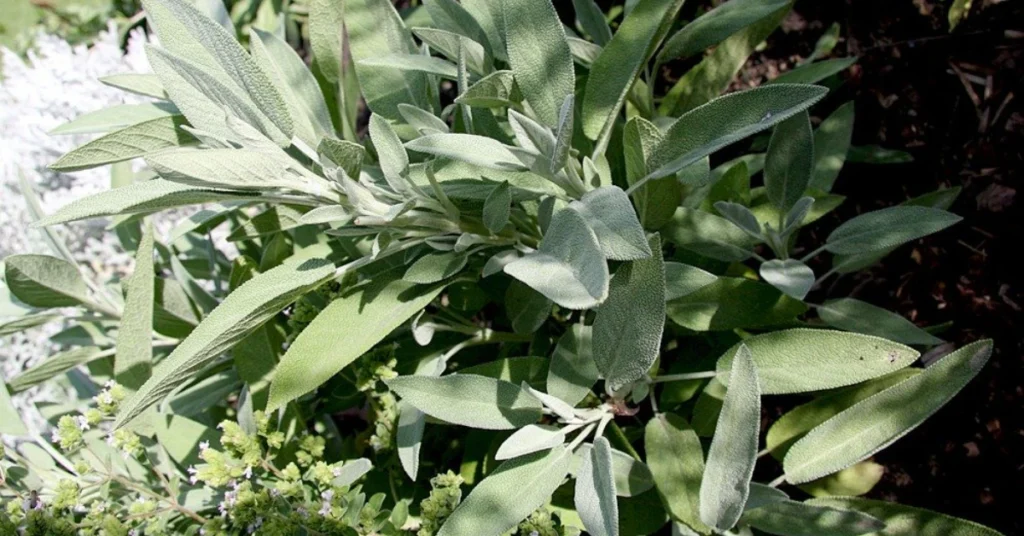
Timing matters more than most people think. Two things decide when you should start cutting: how old your plant is, and where you live.
If your sage is brand new this year, go easy on it. According to NC State Extension, young plants need to put their energy into growing strong roots and stems first. Take just a few leaves at a time, and let the plant get bigger before you harvest more.
If your sage is a year or older, it has earned the right to give more. Established plants can handle regular, heavier harvests without missing a beat.
Your growing zone also shapes your harvest calendar. Sage grows well in USDA Hardiness Zones 4 through 8, but that range covers some very different climates.
In warmer zones (8-9), like coastal California or the Gulf Coast, sage often stays evergreen through a mild winter. That means you can keep harvesting leaves almost all year long, with only a short slowdown in the coldest weeks.
In colder zones (4-6), like the upper Midwest or Northeast, your harvest season has a clear end point. Stop pruning by September 1. Cutting the plant after this date pushes out soft, tender new growth that will not have time to toughen up before the first frost hits. That new growth can die back and weaken the whole plant.
Here is a simple way to remember it:
| Your Zone | Harvest Window |
| Zones 4-6 (cold winters) | Spring through early fall. Stop pruning by Sept 1. |
| Zones 8-9 (mild winters) | Nearly year-round, with lighter picking in deep winter |
Not sure which zone you live in? A quick search of your zip code on the USDA’s hardiness zone map will tell you exactly where you fall.
Proper Technique: How to Harvest Sage Without Killing the Plant

Good tools make a big difference. Grab a clean, sharp pair of scissors or pruning shears. Dull blades crush the stem instead of cutting it cleanly, and that extra damage slows down healing.
Now look at your plant. You want to find a leaf node, the spot where a leaf meets the stem. Make your cut just above one of these nodes. This tells the plant to branch out and grow two new stems in that spot instead of one. Over time, this is what gives you a fuller, bushier plant instead of a leggy one.
Here is the one rule that matters most. Never cut into the bare, woody base of the plant. As sage grows, its lower stems turn hard and brown, almost like a small shrub. NC State Extension warns that these old woody stems rarely sprout new growth once cut. If you chop into that woody base, you may be left with a bare stump that never comes back.
So always look for green, leafy growth and make your cuts there. Stay above the woody part, every single time.
How much to take depends on your goal:
If you just need a few leaves for tonight’s dinner, simply pinch or snip individual leaves from the top of the plant. This is the gentlest kind of harvest, and your plant will barely notice.
If you are harvesting a bigger batch to dry for later, cut whole stems instead. The University of Illinois Extension recommends cutting stems about 6 to 8 inches long when drying is the goal. This length gives you enough to tie into a small bundle and hang, and it leaves plenty of plant behind to keep growing.
Either way, stick to the one-third rule from earlier. Step back and look at your sage. If you have taken less than a third of its leafy growth, you are in safe territory. If you are close to a third, stop there and come back in a week or two.
A little patience goes a long way. Light, regular harvests keep your sage plant productive and attractive, season after season.
Harvesting Sage for Winter and Collecting Seeds
What “harvesting for winter” means depends a lot on where you garden.
If you live in a colder zone (4-6), this phrase has a clear meaning. It is your last big harvest of the season. Do this before September 1, just like we covered earlier. Cutting any later pushes out soft new growth that will not survive the first hard frost. Use this final harvest to stock up on sage for drying, so you have plenty on hand once the plant goes dormant.
If you live in a milder zone (8-9), your sage may stay evergreen right through winter. For you, “harvesting for winter” simply means your picking can continue with less of a hard stop, just slower during the coldest weeks.
Now, what about collecting seeds?
This is a step most guides skip, but it is simple once you know the trick. Normally, you pinch off flower buds so the plant puts its energy into leaves instead of blooms. But if you want seeds, you need to do the opposite on a few stems.
Let some flowers stay on the plant and bloom fully. Then be patient. The flowers will fade, and the flower heads will dry out right on the stem, turning brown and papery.
Once the flower heads look dry and brown, not green or fresh, snip them off. Hold the head over a bowl or paper bag and gently crush or rub it between your fingers. The small seeds inside will fall out.
Let the seeds dry fully for a few more days before storing them in a sealed envelope or jar somewhere cool and dark. Come spring, you will have free seeds ready to start a new sage plant.
Preserving: How to Harvest Sage to Dry or Freeze

Once you have a nice pile of fresh sage, what do you do with it all?
Fresh leaves do not last forever on the counter. The University of Illinois Extension notes that cut sage keeps for about two weeks if you store the leaves loosely in a sealed plastic bag in the fridge. That is fine for short-term use, but if you want sage to last all winter, you need to freeze or dry it.
So which one is better? It depends on how you plan to use it.
| Method | Time Needed | Flavor | Shelf Life |
| Freezing | Fast, just a few minutes | Closest to fresh | Several months |
| Air-drying | Slow, one to two weeks | Milder, mellow | Many months |
| Oven-drying | A few hours | Stronger, concentrated | Many months |
| Dehydrator | A few hours | Stronger, concentrated | Many months |
Freezing is the quickest option and keeps a flavor closest to fresh sage. Many gardeners chop the leaves, pack them into an ice cube tray, cover them with water, and freeze. Drop a cube straight into soups, stews, or sauces as you cook.
Air-drying takes the longest, but it needs no special equipment. Just bundle a few stems together and hang them somewhere dry with good airflow, out of direct sun.
Oven-drying and using a dehydrator both work much faster than air-drying. Low, steady heat pulls the moisture out in a matter of hours instead of weeks.
As a general rule, freezing suits cooked dishes where you want that bright, fresh sage taste, like a pan sauce or roasted vegetables. Drying is better if you want a shelf-stable stock of sage for months of cooking, since dried sage actually has a stronger, more concentrated flavor than fresh.
Either way, you will have homegrown sage on hand long after the growing season ends.
Harvesting Sage for Smudging: Ethics, Species, and Sustainability
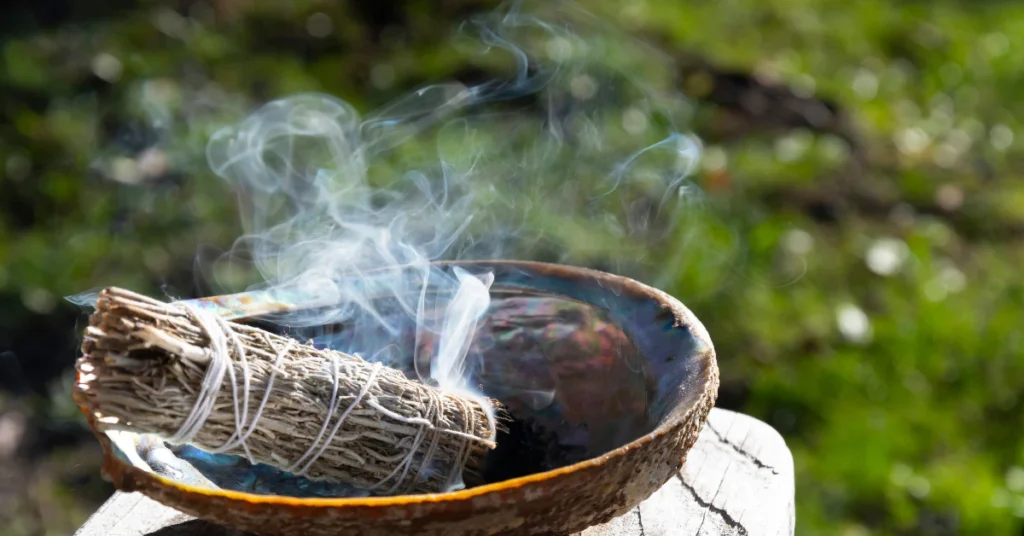
If you are growing sage to use in smudge sticks, there is one important thing to clear up first.
Burning herbs for cleansing is a long-practiced ritual in Native American traditions. This guide mentions it only to give you accurate, neutral information, not to make any claims about its spiritual effects.
“Sage” is not just one plant. The sage in your kitchen garden, called Salvia officinalis, is different from white sage, called Salvia apiana. White sage is the plant most often sold commercially for smudge sticks, and it grows naturally in Southern California and northern Baja California.
This matters because white sage has run into some real problems in the wild. A peer-reviewed study from CSU ScholarWorks looked closely at this issue. It found that picking leaves and branches did not significantly hurt plant size or how many flowers the plants produced. In other words, careful harvesting is not the main threat.
The bigger driver of decline, according to that same study, is habitat loss. As coastal land in Southern California gets developed and native areas turn into invasive grasses, white sage loses the space it needs to grow. Still, conservation groups have raised concerns about wild poaching, where people harvest from natural areas without permission or care for the plant’s long-term survival.
So what does this mean for you?
If you grow your own white sage (or use your garden-variety culinary sage) at home, you are already doing the responsible thing. Homegrown stems avoid any pressure on wild populations entirely. Simply cut healthy stems with leaves attached, bundle a few together with string, and let them air-dry fully before burning.
Growing your own smudging supply is a simple way to enjoy the tradition while supporting the plant’s future in the wild too.
Frequently Asked Questions About Harvesting Sage
How do you pick sage so it keeps growing?
Cut just above a leaf node, the spot where leaves meet the stem. This signals the plant to branch out and grow more leaves right there. Stick to taking a third of the plant at most, and always avoid cutting into the bare, woody base.
Is it better to dry or freeze sage?
Both work well, just for different purposes. Freezing keeps a flavor closest to fresh sage and suits cooked dishes like soups or sauces. Drying takes a bit more time but gives you a shelf-stable stock with a stronger, more concentrated taste. Check the comparison table above if you want a side-by-side look.
What is the best way to dry fresh sage?
Bundle a few stems together and hang them somewhere dry with good airflow, away from direct sunlight. If you want faster results, a low oven or a dehydrator can dry sage in just a few hours instead of weeks.
What part of fresh sage do you use?
The leaves are what you want for cooking. Sage flowers are technically edible too, but they have a strong, musky taste, so most people stick to the leaves and simply pinch off the flower buds before they open.
Is it okay to eat raw sage leaves?
Yes, in normal cooking amounts. The NIH’s National Center for Complementary and Integrative Health notes that sage is likely safe in the amounts typically found in food. The caution is around large, concentrated, or long-term medicinal doses, not a few fresh leaves tossed into a salad or dish.
Can I burn sage from my garden?
Yes. There is nothing stopping you from burning your own homegrown culinary sage. If you specifically want the type traditionally used for smudge sticks, that is white sage, a different species. Either way, growing your own avoids putting any pressure on wild plant populations.
Why do I feel weird after burning sage?
There is no clinical research pointing to anything unique in sage smoke that causes this. The more likely explanation is simple: smoke in a small, closed room with poor airflow can make anyone feel lightheaded or get a mild headache. If you notice this, open a window or move outside. If symptoms feel severe or do not go away, it is worth checking in with a doctor.
What does the Bible say about sage burning?
The Bible does not mention sage or smudging by name. It does talk about burning incense in a worship setting, such as the instructions given to Moses and a reference in Psalm 141:2. Beyond that, views on smudging specifically vary from person to person and church to church. This is a matter of personal belief, not something the Bible addresses directly.
How do I know if my sage is edible?
Check the plant tag or ask your nursery for the Latin name. Culinary sage is Salvia officinalis. Since “sage” is a common name used for many different Salvia species, some grown only for looks, the Latin name is the most reliable way to confirm you have the right plant for cooking.
As a final reassurance, if you have pets at home, common garden sage (Salvia officinalis) is listed as non-toxic to dogs, cats, and horses by the ASPCA. So a curious nibble from a four-legged friend is nothing to panic about.
Conclusion
Harvesting sage does not have to feel risky. Once you know where to cut, how much to take, and when your zone’s season winds down, your plant will keep rewarding you with fresh leaves for years. Whether you are seasoning dinner, drying a winter stash, or bundling stems for smudging, a little care at each snip is all it takes to keep your sage thriving.